
Authentication
OAuth 2.0 Integration (Recommended)
Best for: AI platforms, web applications, and services requiring user-delegated access
Flow: Authorization Code Grant (RFC 6749)
awRAG implements industry-standard OAuth 2.0 Authorization Code Grant flow, enabling your application to access user documents on their behalf.
Prerequisites
- Register your application as an OAuth client with awRAG
- Obtain
client_idandclient_secret - Configure your
redirect_uri(must be pre-registered)
OAuth Flow Overview
diagram
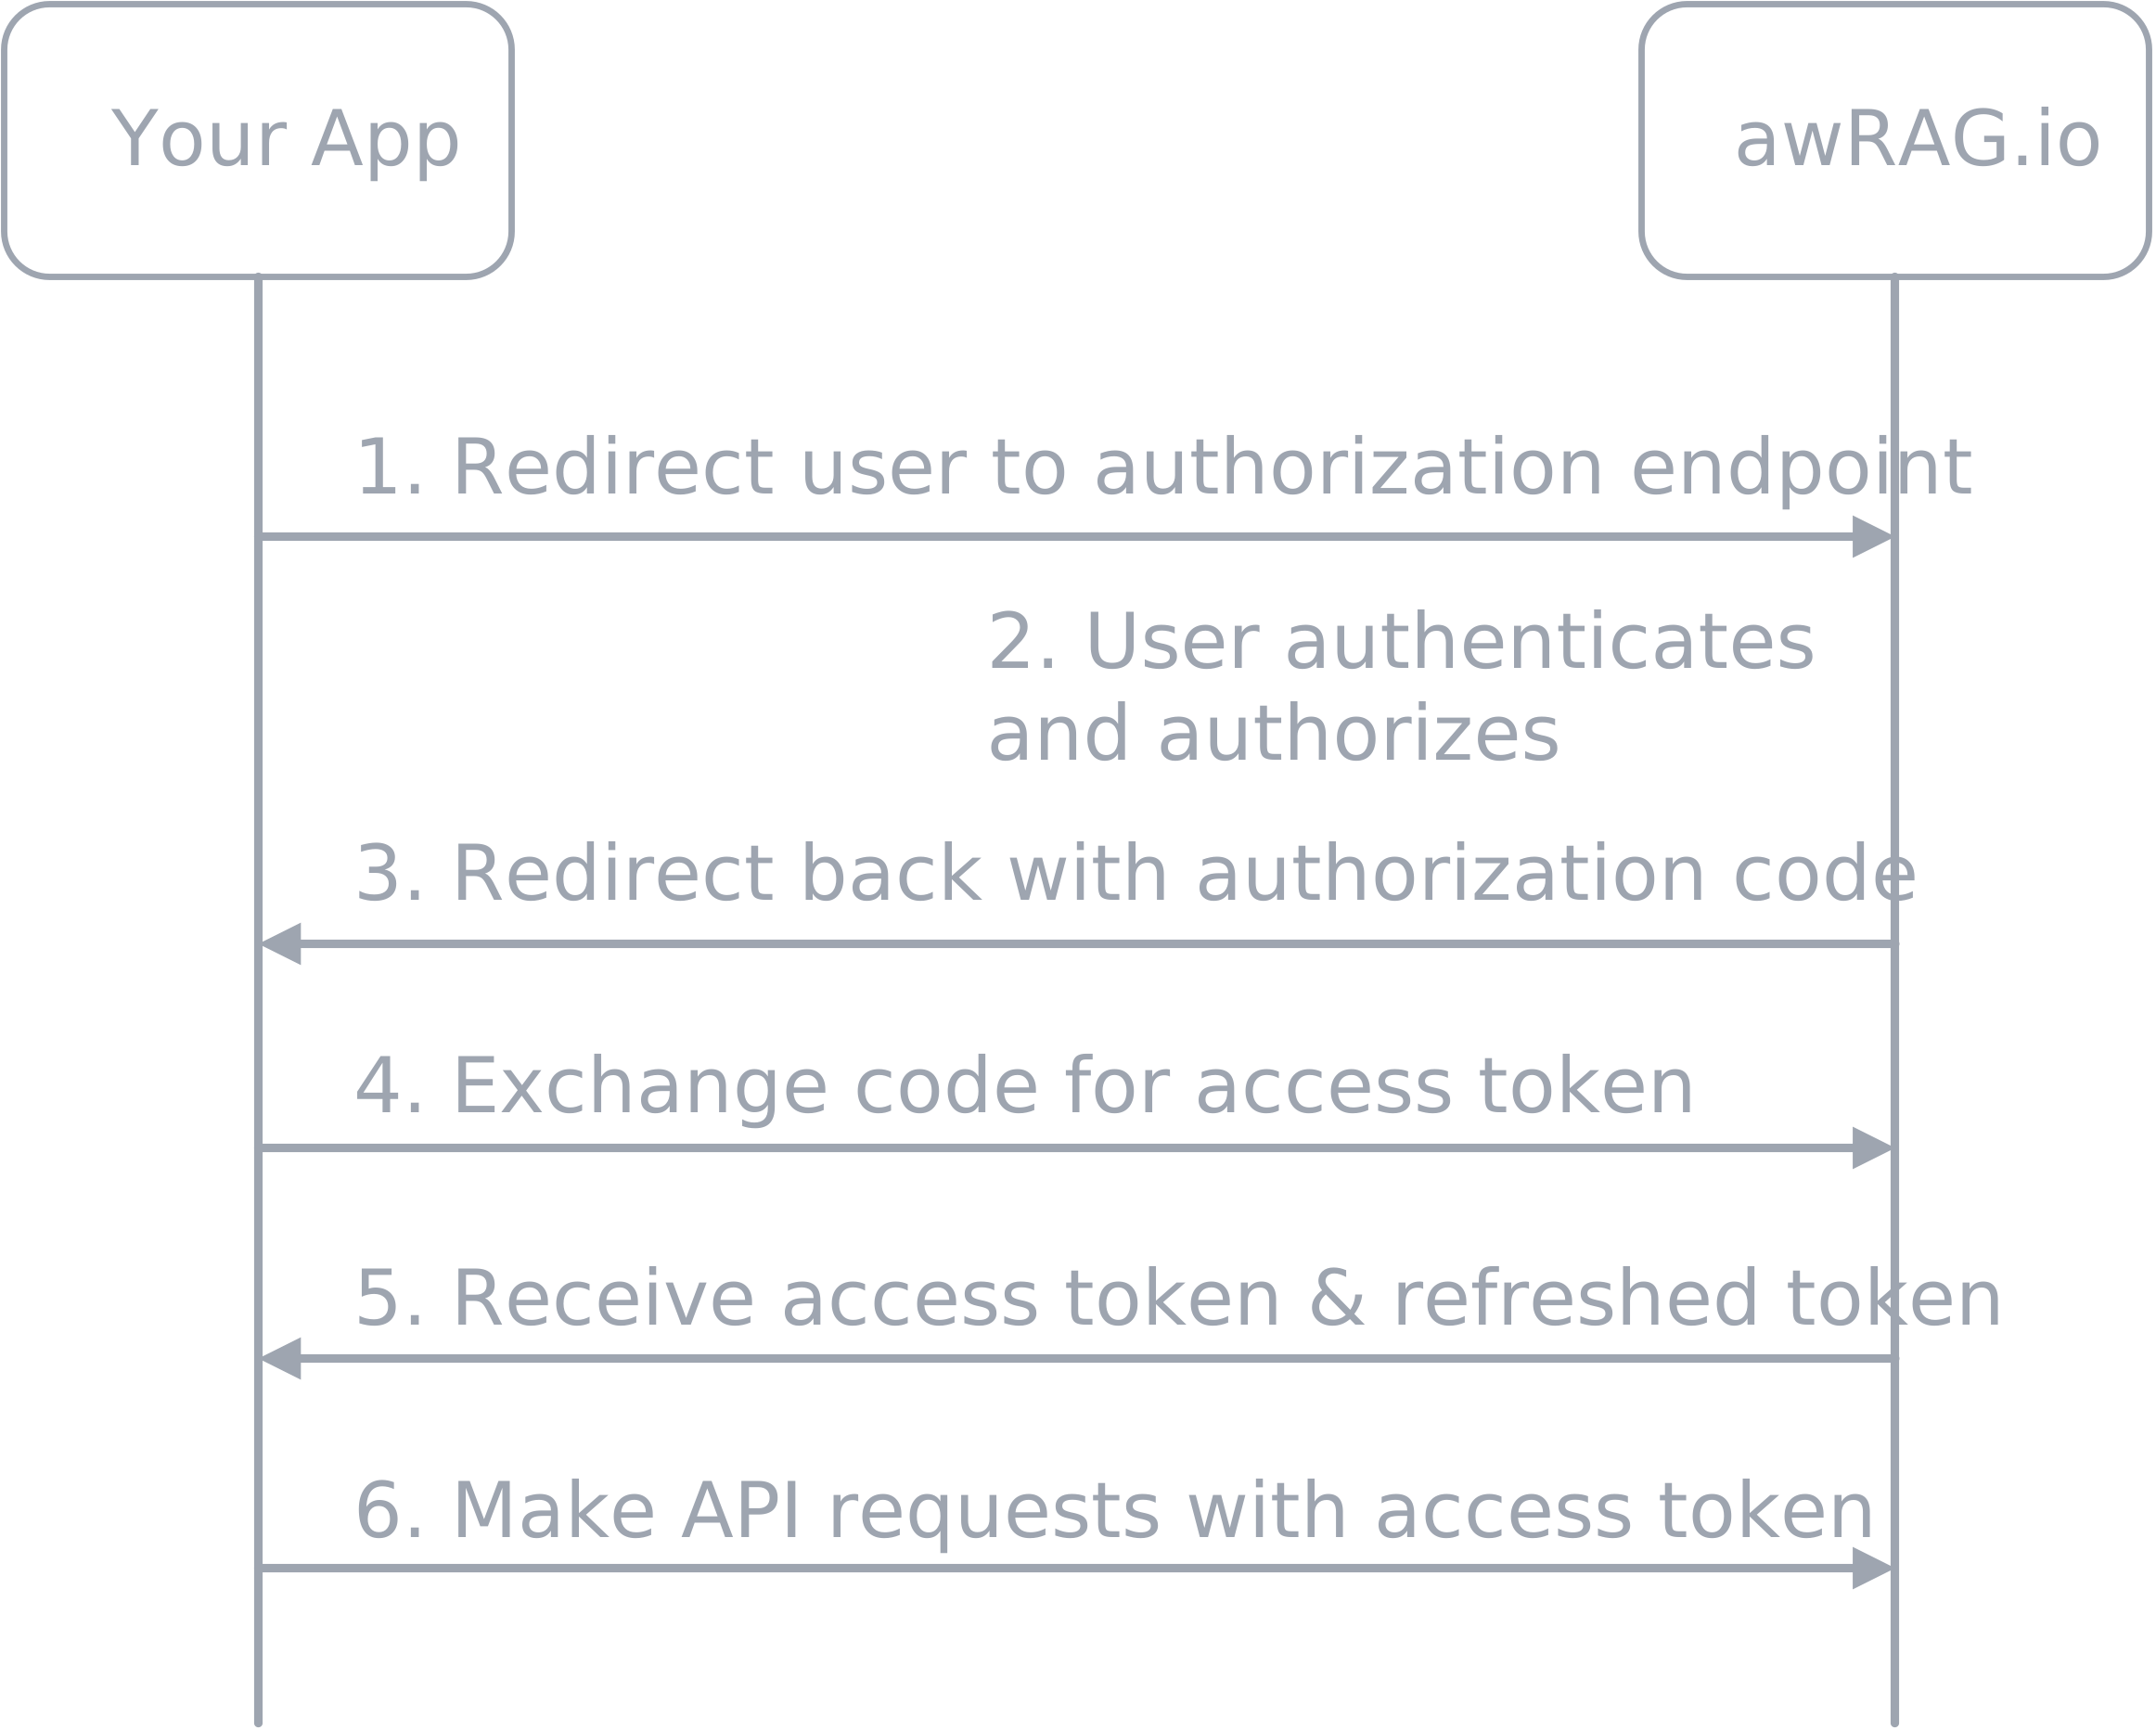
Step 1: Authorization Request
Redirect users to awRAG's authorization endpoint:
http
GET https://awrag.io/api/oauth/authorize| Parameter | Type | Required | Default | Description |
|---|---|---|---|---|
client_id | string | Yes | - | Your application's client ID |
redirect_uri | string | Yes | - | Where to redirect after authorization (must be pre-registered) |
state | string | No | - | Random string for CSRF protection (recommended) |
response_type | string | Yes | code | Must be 'code' |
Example Request:
url
https://awrag.io/api/oauth/authorize?client_id=your-app&redirect_uri=https://yourapp.com/oauth/callback&state=random_string_123&response_type=codeUser Experience:
- If user is not logged in → redirected to awRAG login page
- After login → user sees authorization consent screen
- After consent → user redirected back to your
redirect_uri
Success Response:
url
https://yourapp.com/oauth/callback?code=64_char_authorization_code&state=random_string_123Error Response:
url
https://yourapp.com/oauth/callback?error=invalid_client&error_description=Client+not+found&state=random_string_123Step 2: Token Exchange
Exchange the authorization code for access and refresh tokens:
http
POST https://awrag.io/api/oauth/tokenRequest Headers:
text
Content-Type: application/jsonRequest Body:
json
{
  "grant_type": "authorization_code",
  "code": "64_char_authorization_code",
  "client_id": "your-app",
  "client_secret": "your_client_secret",
  "redirect_uri": "https://yourapp.com/oauth/callback"
}
Success Response (200 OK):
json
{
  "access_token": "64_character_hex_token",
  "token_type": "Bearer",
  "expires_in": 3600,
  "refresh_token": "64_character_hex_refresh_token",
  "scope": "read:documents write:documents"
}
Important Notes:
- Authorization codes expire in 10 minutes
- Authorization codes are single-use (replay attacks prevented)
- Access tokens expire in 1 hour (3600 seconds)
- Refresh tokens expire in 30 days
- Store tokens securely (never expose in client-side code)
cURL Example:
bash
curl -X POST https://awrag.io/api/oauth/token \
  -H "Content-Type: application/json" \
  -d '{
    "grant_type": "authorization_code",
    "code": "abc123...xyz",
    "client_id": "your-app",
    "client_secret": "your_secret",
    "redirect_uri": "https://yourapp.com/oauth/callback"
  }'
Step 3: Using Access Tokens
Include the access token in the Authorization header for all API requests:
text
Authorization: Bearer {access_token}Example:
bash
curl -X POST https://awrag.io/api/v1/search \
  -H "Authorization: Bearer 64_character_hex_token" \
  -H "Content-Type: application/json" \
  -d '{"query": "machine learning", "limit": 5}'
Token Refresh (Coming Soon)
When access tokens expire, use refresh tokens to obtain new access tokens without requiring user re-authentication:
http
POST https://awrag.io/api/oauth/tokenRequest Body:
json
{
  "grant_type": "refresh_token",
  "refresh_token": "your_refresh_token",
  "client_id": "your-app",
  "client_secret": "your_client_secret"
}
OAuth Error Codes
| Parameter | Type | Required | Default | Description |
|---|---|---|---|---|
invalid_client | Error | Yes | - | Client ID not found or client_secret incorrect |
invalid_grant | Error | Yes | - | Authorization code invalid, expired, or already used |
invalid_redirect_uri | Error | Yes | - | Redirect URI doesn't match registered URI |
unsupported_grant_type | Error | Yes | - | Grant type not supported |
server_error | Error | Yes | - | Internal server error |